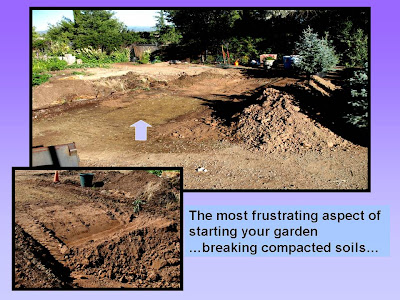
The following is a general soil preparation process that we have used with some success in Northern New Mexico. For us, the most critical part of a successful garden is the condition of your soils.
First, do not till or cultivate invasive weeds and seed into your garden. Remove existing weeds, grass, and other plant material. This should go into your compost pile/pit or disposed of, if it contains weed seed.
Tip: use sharp tools…particularly shovels, picks, and other hand tools. It will reduce your labor by reducing friction and resistance with every stroke.
After that, cultivate or double dig the existing soil as deep as required for your project. We recommend 8-14”. Remember to adjust for final grade after all the amendments are added. It is likely you’ll have to remove some of the native soil. Your finish grade with all the organic amending will be approximately 2-4” higher than the previous finish grade.
Another option is the use of a compost pit (to be discussed in a future post).
Next, spread and cultivate compost (Soil Mender Topsoil and/or Soil Mender Composted Cotton Burrs) across the bed area - 4" deep for groundcover, 6" deep for shrubs and vines, and as much as 8" deep for vegetables, perennials, groundcovers, and small shrubs.
Next, add dry molasses, Planters II, and Yum Yum Mix at a rate of 2 lbs. per 100 square feet and mix into the upper 2-4 inches.
Finally, level with steel or leaf rake and plant.
Some of the tilling/cultivation may have to be accomplished by hand.
Tip: you can soften compacted garden soils by watering the night before you start working.
Put a mulch layer around transplants and seedlings when they are large enough. Cover all the bare soil. Small gravel mulch for cacti, penstemon, and lavenders.
Tip: work your soil early in the morning before it gets too hot. A better idea would be to do some of the heavy work during the winter or dormant season. You won’t run out of energy as quickly!


No comments:
Post a Comment