
Tuesday, August 16, 2011
Sunday, June 26, 2011
Broccoli

We planted this "Blue Wind" broccoli at the very end of March and have been harvesting beautiful bunches for a couple of weeks now. Here is the most recent harvest:

Garden update 6/26

This is a quick report from the garden. The sun is very intense at 7000 feet and the high temperatures have been into the upper 80s during the last 15-20 days. As a result, our recently planted (14 days ago) tomatoes, zucchini, peppers, and mixed seedlings are growing rapidly. The tomatoes planted in the ground and in containers are growing at a rate of approximately ½ inch per day. Fruit is starting to set on the tomatoes and peppers. We’re starting to stake tomatoes for two reasons—rapid growth and our destructive winds. This year our winds are blowing longer than usual and our seasonal monsoons have not started.
At the same time last year (2010), our garden was only a 1/3 of its current size and none of the tomatoes or chiles had been planted. If 2010 was an indication of the garden production we may expect this year…then 2011 should be amazingly productive.
Those plants and seed we still need to plant, corn, bean, eggplant, cantaloupe, honey dew, pumpkins, and other mixed cucurbits.
Our onions are just starting to bulb and hopes are high that we’ll have nice 3 in. diameter, short-day onions.
Cool season crops: small cabbages are starting to form and we’ve been harvesting broccoli for a week.
Yesterday we went through our herb and perennial bulb bed cleaning out spent plants and preparing the soil for more herbs and pumpkins.
Finally, we’ve just mulched half the garden with straw to reduce evaporation and hopefully heat stress. Our very low humidity during this dry and windy period is a good reason to mulch.
Sunday, June 5, 2011
Gray fox in the garden
Last Sunday morning at 6am, I had the good fortune to receive a visit from an adult gray fox.
Working in the garden, I looked up to see a fox looking back at me. After the initial startle, I started to analyze why she was there. I didn’t react and was surprised to see her relaxed posture and maneuvers throughout the garden. I began to realize she knew the garden and the lay of the land.
This vixen knew all the gaps in gates and fences. She growled in my direction, suggesting some portion of this garden was her domain. She wanted me to know I was trespassing. Her beautiful coat suggested good health and an abundance of food.


Sunday, May 29, 2011
Tilling and containing
We found one of our beds to be a little on the shallow side so it was tilled with this super tiller:

Also, we've potted up various tomatoes and peppers as well as some artichokes in some 7-15 gallong nursery containers.


Tuesday, May 3, 2011

Thursday, April 7, 2011
Super soil amending
The following is a list of soil amendments for (at-grade) garden preparation:
4 parts – existing and/or native soils (cultivate and loosen as deep as possible before adding amendments)
2 parts – Soil Mender Topsoil
2 parts -- Soil Mender Composted Cotton Burrs
5 lbs. per 100 sq. ft. – Soil Mender Planters II
5 lbs. per 100 sq. ft. – Yum Yum Mix
5 lbs. per 100 sq. ft. – Soil Mender Stimulate (Molasses+Humates)


Soil amendments (backfill for containers and raised planters):
2 parts – High Country Gardens potting soil or Sungro #902 and/or #702 potting soils
2 parts – Soil Mender Topsoil
1 part – Soil Mender Composted Cotton Burrs
1 part – existing site and/or native soil
5 lbs. per 20 cu. ft. – Soil Mender Planters II
5 lbs. per 20 cu. ft. – Yum Yum Mix
5 lbs. per 20 cu. ft. – Soil Mender Stimulate (Molasses+Humates)
40 lbs. per 20 cu. ft. – Scoria (vesicular lava)

Notes:
1. 1 cu. yd. = 27 cu. ft., Example: 1 cu. yd., 4 in. deep, will cover 81 sq. ft.
2. We used these named “Soil Mender“ products, because they are readily available in Northern New Mexico and are composted. Good composting techniques will kill most weed seed and is easier to work with when cultivating. These amendments are not the only sources, they are just the ones we used.
3. We also added coffee grounds, compost, worm castings, old potting soils, and other products, when available.
4. We tried to be 90-95% ‘organic’ in our approaches to soil preparation. Like anyone else, we’d like to minimize our exposure to toxic materials.
Soil prep 101
The following is a general soil preparation process that we have used with some success in Northern New Mexico. For us, the most critical part of a successful garden is the condition of your soils.
First, do not till or cultivate invasive weeds and seed into your garden. Remove existing weeds, grass, and other plant material. This should go into your compost pile/pit or disposed of, if it contains weed seed.
Tip: use sharp tools…particularly shovels, picks, and other hand tools. It will reduce your labor by reducing friction and resistance with every stroke.

After that, cultivate or double dig the existing soil as deep as required for your project. We recommend 8-14”. Remember to adjust for final grade after all the amendments are added. It is likely you’ll have to remove some of the native soil. Your finish grade with all the organic amending will be approximately 2-4” higher than the previous finish grade.

Another option is the use of a compost pit (to be discussed in a future post).
Next, spread and cultivate compost (Soil Mender Topsoil and/or Soil Mender Composted Cotton Burrs) across the bed area - 4" deep for groundcover, 6" deep for shrubs and vines, and as much as 8" deep for vegetables, perennials, groundcovers, and small shrubs.
Next, add dry molasses, Planters II, and Yum Yum Mix at a rate of 2 lbs. per 100 square feet and mix into the upper 2-4 inches.
Finally, level with steel or leaf rake and plant.
Some of the tilling/cultivation may have to be accomplished by hand.
Tip: you can soften compacted garden soils by watering the night before you start working.
Put a mulch layer around transplants and seedlings when they are large enough. Cover all the bare soil. Small gravel mulch for cacti, penstemon, and lavenders.
Tip: work your soil early in the morning before it gets too hot. A better idea would be to do some of the heavy work during the winter or dormant season. You won’t run out of energy as quickly!
Tuesday, April 5, 2011
Cool season vegetables
Starting cool month vegetable crops at 7000 feet of elevation…
Broccoli can be planted between March and June. It requires approximately 4 months to begin harvesting. Harvest the main broccoli heads before they open or they will go to flower. This way the remaining broccoli will produce an extended crop of smaller heads through the rest of summer. The flowers are edible.

Brussels sprouts should be planted between May and June. Their maturity period is 4-5 months. So you’ll have a fall crop.
Kohlrabi and cauliflower can be planted between March and June. They mature in about 3 months.


If needed, you can plant cabbages indoors in a coldframe, then transplant into your garden. They take about 4 months to mature and some cabbages can produce for 2 seasons.
Carrots can be planted whenever the ground thaws or in small containers. Seed directly into the garden between March and April. Plant a fall crop in August and September. If protected from extreme winters, you can harvest carrots during the winter and early spring.
Bush peas can be planted in March and April. They take 3 to 4 months to mature. Be sure to harvest them when the peas are young.
Lettuce and arugula can be grown almost year-round, depending on the variety. The easiest time to plant lettuce is in the spring in April. You can start planting lettuce in coldframes indoors between February to March before transplanting to your outdoor garden in spring. They mature in 30 to 60 days. Plant a fall crop in August and September.
Onions can be planted as the soil thaws. Plant seed, bulblets, or slips. Harvest to thin and for use at anytime. Red, yellow, and white varieties all perform well. The short day forms are recommended at this latitude for good bulbing sizes.


Spinach is extremely hardy and can be sown in coldframes at anytime. Sow in the garden in March-May and again in August-September for a healthy fall crop.
Collard greens are a wonderful crop for children to try as a learning experiment. Easy to grow, the seed can be sown in March-April, with a second crop in August-September. Greens are a healthy (high in a number of vitamins and minerals) southern U.S. traditional food. Harvest the tender leaves and season with pork or search for a vegetarian recipe.
Remember that different vegetables have different tolerance to heat; therefore you need to know the climate conditions in your own area well. Plant your vegetables according to when the temperature is most suitable.
If your crop is damaged…then plant again or re-sow seed.
Original source: Francis King (edited/revised by Greg Tickle)
Sunday, March 27, 2011
Perennial garden sprouting...
After a long cold winter (November 2010-February 2011), those perennials that are sprouting (at 7000 ft.) include: thymus (English thyme), penstemon, tulipa, kniphofia (red hot poker), linum (blue flax), and...


This is a summary from two separate perennial gardens at the same elevation. We're in USDA plant hardiness zone 5-6.
The only clean-up we're doing is some pruning. The cuttings make good mulch and more likely most of that will blow away with our March-April winds.
Just a reminder we're in the high desert.
Iris

Narcissus (daffodil)

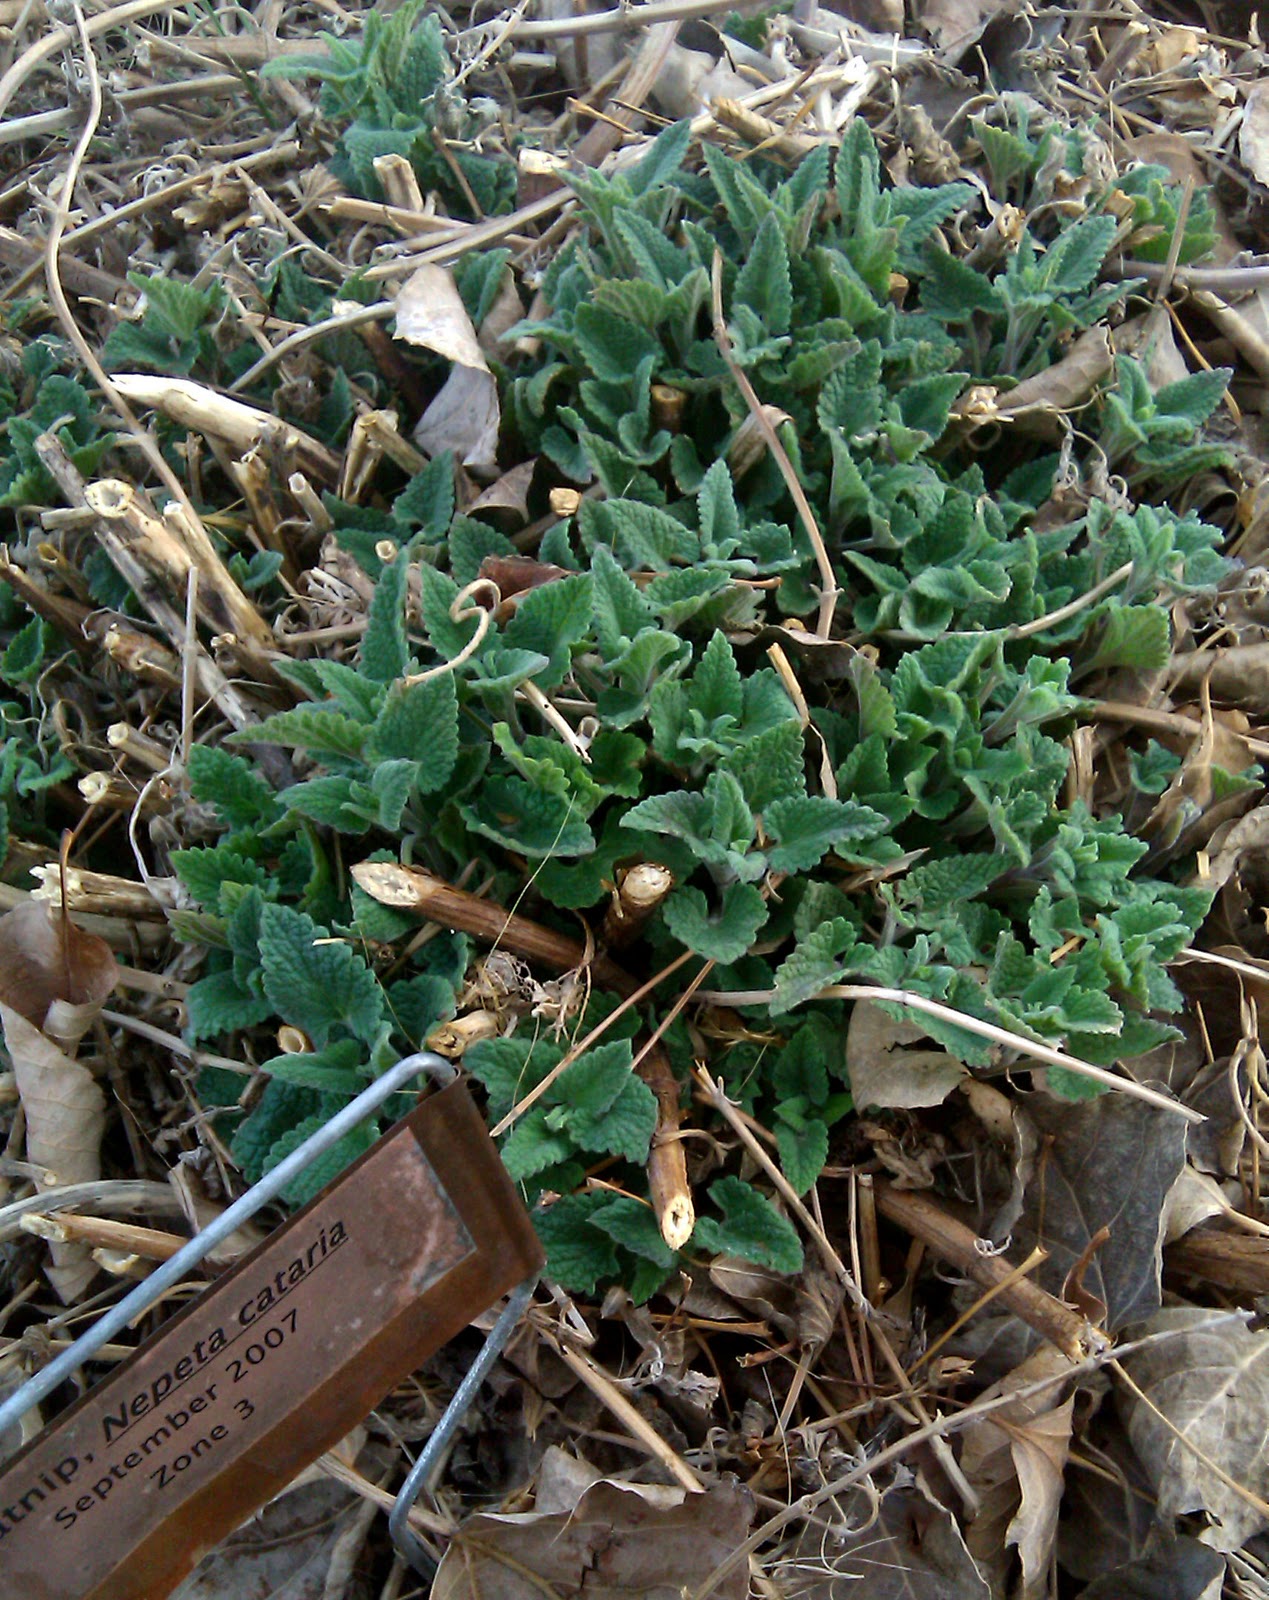
Nepata (catnip)
Agastache

Papaver (poppy)

And this rhubarb has popped back up in the vegetable garden!

These violas survived in the garden all winter long as well:

This is a summary from two separate perennial gardens at the same elevation. We're in USDA plant hardiness zone 5-6.
The only clean-up we're doing is some pruning. The cuttings make good mulch and more likely most of that will blow away with our March-April winds.
Just a reminder we're in the high desert.
Saturday, March 19, 2011


A look back at winter
On August 19th of 2010, seeds were sown in our community vegetable garden. These shots were taken on January 17th of this year. With a good soil preparation and a row cover laid directly over the plot, we had fresh vegetables all winter long.
Carrots, radishes, turnips, collards, several types of lettuce, arugula, spinach, pak choi and cilantro all flourished under the cover.


Carrots, radishes, turnips, collards, several types of lettuce, arugula, spinach, pak choi and cilantro all flourished under the cover.


Our garden history...at 7000 ft.
This is our first post. We think it will be interesting for people to see gardening projects that you can do at 7000 ft. of elevation in an area that only receives 8-12 in. of moisture (snow/rain) annually.
Here in Northern New Mexico, we have to really pay attention to soil prep. and create the best growing environment possible before planting anything. Actually, once you get through that 1st 4-6 inches of hard compacted surface silt and clay, it gets a lot easier to cultivate your soil.
The better our bed preparation has been, the better our results.
In our posts, we'll talk about vegetables, herbs, perennials, and the natural world outside our doors. We hope to post information from several gardens throughout our area.


Subscribe to:
Comments (Atom)